Homemade Berry Ice Cream

Santosh Jha
| 30-10-2026
 · Food Team
Homemade berry ice cream combines the natural sweetness of ripe berries with the smooth richness of whipped cream.
This colorful frozen dessert is easy to prepare without an ice cream maker, making it a lovely choice for family gatherings, warm afternoons, or a homemade treat after a meal.
A blend of strawberries, raspberries, and blueberries creates a balanced fruit flavor, while sweetened condensed milk adds sweetness and contributes to the creamy consistency. With gentle mixing and sufficient freezing time, you can make a delicious dessert without complicated techniques.
Ingredients
- 2 cups mixed fresh berries, such as strawberries, raspberries, and blueberries
- 2 cups cold heavy cream
- 1 cup sweetened condensed milk
- 1 teaspoon vanilla extract
- 1 tablespoon fresh lemon juice, optional
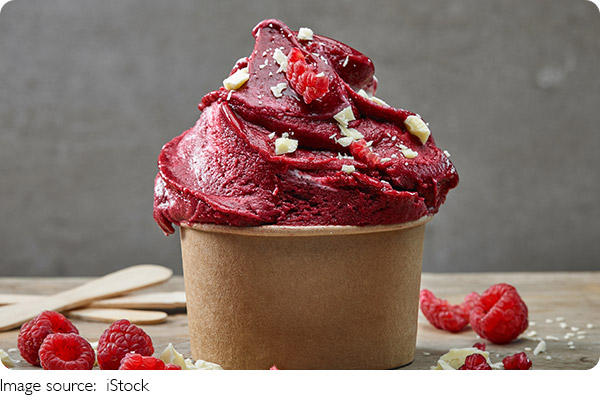
How to Make Homemade Berry Ice Cream
1. Prepare the Berries
Wash and thoroughly dry the berries. Remove any stems or leaves, then blend the fruit until smooth. For a finer consistency, pass the purée through a fine-mesh sieve to remove most of the seeds.
2. Mix the Berry Base
Combine the berry purée, sweetened condensed milk, and vanilla extract in a large bowl. Add the lemon juice if you prefer a slightly tangier flavor. Stir until the ingredients are evenly incorporated.
3. Whip the Cream
Place the cold heavy cream in a separate bowl. Using an electric mixer or whisk, beat until soft to medium peaks form. The cream should be fluffy and hold its shape while remaining smooth. Avoid overwhipping.
4. Fold the Mixture Together
Add the whipped cream to the berry base in two or three additions. Use a spatula to fold gently until the ingredients are evenly combined. Avoid vigorous stirring, which can remove the air incorporated into the cream.
5. Freeze Until Firm
Transfer the mixture to a freezer-safe container and smooth the surface. Cover securely and freeze for at least six hours, or until firm enough to scoop. A shallow container may help the mixture freeze more evenly.
6. Serve
Let the ice cream soften briefly at room temperature before scooping. Serve in chilled bowls or dessert glasses, with a few fresh berries as an optional garnish.
Tips for the Best Texture
Choose Ripe Berries
Select fruit with a strong aroma and good flavor. A mixture of berries creates a more layered taste, while a single variety produces a more distinct fruit flavor.
Remove Excess Liquid
If using thawed frozen berries, drain away excess liquid before blending. This helps limit the formation of ice crystals.
Fold Gently
Incorporate the whipped cream gradually and stop once the mixture is evenly combined. This helps preserve its airy texture.
Keep the Container Covered
A secure lid helps protect the ice cream from freezer odors and reduces moisture loss during storage.
Serving and Storage
Serve the ice cream on its own or accompany it with fresh berries for added color and texture. For an elegant presentation, place each scoop in a chilled bowl and finish with a simple berry garnish.
Store leftovers in a tightly covered, freezer-safe container. For the best quality, enjoy the ice cream within one to two weeks. If it becomes too firm to scoop, allow it to soften briefly at room temperature. Avoid repeated melting and refreezing, as temperature fluctuations can make the texture less smooth.
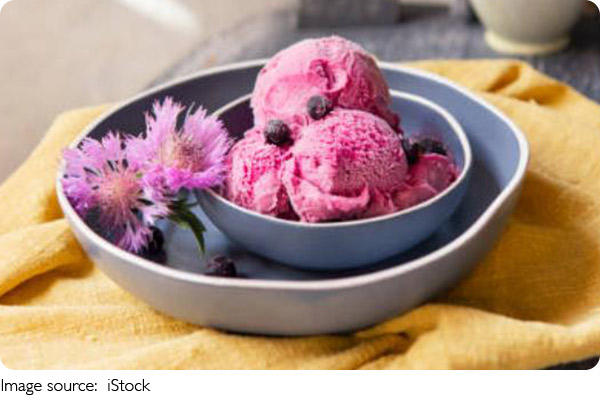
A Fresh and Creamy Homemade Treat
Homemade berry ice cream offers a simple way to enjoy the bright flavor of fruit in a creamy frozen dessert. Its accessible ingredients, no-churn method, and customizable berry combinations make it suitable for everyday treats and special occasions. Follow the steps carefully and allow enough time for freezing to create a smooth, refreshing dessert at home.